Pages

Sunday, October 14, 2018

Fortunate Impromptu Shop Hop


Since Wednesday I have managed to visit 5 different quilt shops without leaving the state, participating in a planned shop hop, or even traveling on a bus tour.  Wednesday, I traveled from my little town to nearby Hannibal, Missouri--yes, Mark Twain's hometown--and spent a few minutes in both of the quilt stores in historic downtown.  Both Bits and Pieces and The Hickory Stick are nestled in the midst of the Mark Twain Museum and surrounding shops and carry a fine array of the best fabrics and patterns.

 Last night, a friend and I went to the northwest corner of the state, and today we visited, Quilting is My Therapy in Liberty, Missouri Star Quilt Company in Hamilton, and Sew Sweet Quilt Shop in Brunswick and were home before 5. We had planned to leave early today and go to MSQ and hit Sew Sweet on the way back.  However, after a grueling day at work, we spontaneously decided that we needed a little road trip to punctuate our week.  The bonus was time to go into Liberty to QMT and have breakfast at a cute little diner there named Ginger Sue's as well.

It occurred to me on the way home this afternoon that we are very fortunate here in Missouri to have such wonderful catalysts for our hobby.  Not only can you find various locally owned shops all over the state, but we are home to Tula Pink, Angela Walters, and Jenny Doan.  I have been to Hamilton and Liberty to the world famous shops multiple times.  I have even met Tula Pink and have the autograph and pictures to prove it.  The Hickory Stick, Bits and Pieces, and Sew Sweet Quilt shops never disappoint. Quilting is My Therapy is fun for all the important reasons.  Not only does QMT have beautiful fabric and great patterns and notions, but it is owned by Angela Walters--star struck! MSQ is a mecca for fabric lovers and is always fun.

There are many, many more quilt and fabric shops in our centrally located state.  A few more of my favorites include Appletree Quilting and Satin Stitches in Columbia, and O Sew Personal in  O'Fallon.

What are some of your favorites?

Happy Shopping
M

Sunday, July 10, 2016

A Little Tense over the Tension!

Yesterday I started experiencing tension issues with my HQ Simply Sixteen.  So I danced right on over to YouTube! I watched several videos on thread tension, but these two were the most helpful for me: Taking the Stress Out of Tension and Adjusting Bobbin Tension.  Both have proven to be very informative.  Now my biggest issue is that once I get the tensions set and looking great, I still occasionally have bobbin thread blinking to the top. It isn't every stitch, just every little bit and usually in a loop or curve.  I know I can figure it out, it will just take time and practice, but in the mean time it is making me a little crazy. 

Despite the tension troubles, I have been having a lot of fun practicing.  I have found several remnants of backing width fabrics to load and use for my practicing.  I also went in to the local Ben Franklin's sidewalk sale and purchased some printed panels to use in my attempts as well.  They were all on the clearance table with an additional 50% off. Score!  The plan is to practice edge to edge motifs for a bit longer then "execute" them on the panels. Pardon the pun!  Some of the panels are seasonal. so I can take them to my classroom and hang them on the door.  The others can become table runners or something.

The stars are fairly easy, but spacing and figuring
"lyrics" are still in the works!  Down, up, over,
across, up. Now do the Loop de lou!
  I have also been cutting the practice pieces up to use later.  I inspect my work and find the sections that look the best.  Then I cut them into the largest pieces I can.  I am saving them to make potholders or bags or place mats, and such later.  This way I can toss the messes and admire the successes! I am finding this to be a good a way to use up my older stash as well.

In the mean time, I feel that I am conquering the STAR.


M

P.S.  Last night I returned to my comfort zone for some much needed relaxation--PATCHWORK!  That did the trick!

Friday, July 8, 2016

Day 3--I THINK I CAN become a free motion quilter--or a dancer!

Really, I am starting to feel like I might just be able to do a fair job of quilting a small quilt with an edge to edge motif by the end of next week. Unless the contractors come to remodel my bathroom--then it may be a while.

Today was a pretty good practice session.  I tried to work with my loops and duplicate a tight horizontal motif that is really a bit vertical.  I have seen it before, and I think it looks quite lovely in borders and such. I did find as I practiced that I was having trouble changing directions at some spots in a design and/or when I tried to come back across the quilt.

 Oh, first I need to tell you that I am a south paw. I use scissors in my right hand, but I do everything else left-handed.   Now this is the problem I am experiencing: I start on the left side of the quilt and move to the right as if I were reading.  I can manage most of the turns and twists that I have tried when I travel that direction, but when I try to come back from the right, it is like I have no clue what I am even trying to create!  Crazy! I think it may have something to do with the way I think or navigate life in general because of my left-handedness.

I should also probably tell you that I have an empty nest, my husband works during the day, and I often do not speak from the time he leaves until he comes home. (Don't worry, I make up for it when I am around people or all school year in my classroom!)   HOWEVER! today I heard my voice loud and clear for about an hour, an it almost startled me.  I realized that I speak the motif when I am practicing--to the left, to the left, to the left, so I finally figured out that I need to say--to the right, to the right, to the right--to return from right to left.  I am sure if anyone had come into my house and heard me, they would have wondered what kind of a dance I was trying to do! But it really worked.
To the left, to the left!

To the right, to the right!

Now that I have thought about this, I think it might be a key to learning the process. So if saying them aloud and reversing the direction to come back is going to make a difference, then that is what I am going to do.  Just promise you won't judge me, if you ever run into the crazy lady talking herself through her work. ;>)

M

Thursday, July 7, 2016

Day 2--Learning to free motion quilt on my HQ Simply Sixteen:

Well I must say that my second day proved to be a good day of learning.

Three things I learned today:  1. It pays to "doodle" the designs for a while first!  2. Relax, the word "free" means many things go. 3. It is just PRACTICE at this point.

I have been doodling easy designs I have seen for some time now.  These are some of the motifs I am trying to accomplish first. I believe that when the experts say doodle and practice the motifs, they are correct!  The ones I can make look decent on paper, look better on fabric for me even this early in the game.

 Like many quilters I know, free motioning on my standard machine makes me a nervous wreck.  I want to control every stitch.  Tonight I looked at some examples of good free motion designs up close--amazing what increasing a screen to 250 or more can do!  So I have decided to relax a little and let it be a "free" activity for me.  Not every stitch can be in the perfect spot--just most of them.

And, practice makes perfect. No one is perfect without practice.  So I will move on to Day 3 with a positive attitude and happy happy thoughts.

Stay relaxed and positive!
M
Feeling good about meanders!

Pretty proud of this little leaf!  Been doodling
leaves my whole life!


Wednesday, July 6, 2016

A New Toy for the Sewing Room--Handi Quilter Simply Sixteen on a 10' frame

So I really promised myself that I would start writing and sharing again this summer.  June was crazy for me as my husband and I took a car trip to Maine.  It was a wonderful trip with great seafood and amazing scenery. We had a great time and hated to come home, but family and jobs are here. So, we are too.   On the way home, we stopped to see our grandson and his parents who live a few blocks from a terrific quilt store, O Sew Personal.  My plan was to stop by and look at the Handi Quilter Simply Sixteen machine one more time.  Did that! Bought it!


The next day I ripped up carpet, polished the old wood floor, and moved my sewing room into a much bigger space. Today, Kelly and her assistant came to my house and installed my new machine.  I was so excited, I probably talked their legs off! Sorry ladies!

Once they finished and left, I fixed the Red Snappers and installed them then got to my first real practice session.  Here are the results.

I still need to move the closets around and do some organizing, but maybe I will get to that after a bathroom remodel and the new wears off the HQ! Practice! Practice! Practice!

Talk soon!
M

Monday, February 15, 2016

Lazy or Just a Much Needed Sewing Hiatus

I can not decide if I am getting lazy in my older age, or if I have just been giving myself a much needed break from my sewing and knitting habit.  However, since I am not really a fan of laziness or even the word lazy, I am going to say that is has been a much needed break from sewing, so I could develop my knitting skill, which is not quite up to par yet.  I have also been exercising most days with some fellow staff members and trying just keep up with life in general.  Time suckers for sure!  I must say though that I truly look forward to that workout everyday, and I am grateful to my partners in  health who have been there keeping me moving and motivating me ever step of the way.

As of the last few weeks, I can with all honesty say "I'm baaaack!"  Ideas have been haunting me at night and sewing has been happening in my little woman cave! I have made a few trips to my favorite quilt store, Material Girl Quilt Shop, and my inspiration is on the upswing.  I have not made anything too original that I can take credit for yet, but truly some fun sewing for my gift stash and some very important people is in the works. So this is what I have been up to lately.

Pinwheel quilt--I love the colors.  I used a charm pack from Moda--my favorite fabric brand--and the Missouri Star Quilt Company pinwheel shortcut!  I love the vibrant colors, and talk about a fast baby quilt!  I even tried something new--blocks on point.  I have been quilting for about 15 years and had never done a block on point!  Love it.


Mother's Work--I also finally finished my mother's quilt.  I realized that I am still hand quilting on a baby quilt top of hers, so it was okay to finish this one! Her work is still not finished in my heart, anyway!
That is all I can share today, but I can finally say that I am working on all sorts of things as of this past weekend, so be ready.  I have my stitchin' fever back, and soon I might even feel like I can show you some of my knitting projects!

Have a great week!
M


Wednesday, August 5, 2015

Where Did Summer Go?

I am a teacher, so every year about April I start making my list of things to make over the summer. This summer I had a very long list of sewing accomplishments to achieve, but honestly I think I deserve a C for my efforts.  I started off with a stitch, but ended up in a knot!  I wish I could say my dog ate my batting or something, but that is not the case.


In June I did a great deal of sewing and knitting for my new grandbaby, and taught a sweet young lady to sew through 4-H.  Since then I have been attending a conference, traveling back and forth to see the grandson, vacationing, and cleaning.  Now summer is over for me.  Frankly, I am sort of glad. Maybe I can get back in my routine and get to sewing and knitting again.  

Yesterday, a dear friend of mine and I took the day to go to Missouri Star Quilt Company and Sew Sweet Quilt Shop.  We had a great time, and great food at Poppy's Bakery and Kaitlynn's Deli.  We even found a terrific resale shop, Upriver, and truly came home inspired to get busy again. Here in the Midwest, we have so many little gems of our own to make this wonderful hobby--lifestyle--truly wonderful.  It was nice to make this trek
and rejuvenate with great company. Of course I still love my favorite little store, Material Girl Quilt Shop, closer to home, but these shops are fantastic too.

 So, last night after my workout to counteract all that great food,  I took a break from the world and made this little cuff bracelet to add to my jewelry collection--in about a week I will have to wear real clothes again! I thought this might add a little something to my accessories!

Hope you had a great stitching summer.
M


Saturday, June 6, 2015

A Mother's Work Is Never Done

It has been such a long time since I have posted anything! It seems that most of my winter and spring sewing and knitting has been for the creation of gifts, and one-of-a-kinds for my grandson, who is due to arrive very soon. So now that I have all of that under control and most of it gifted, it is time for me to settle in to my summer routine of work a little and play a lot. I just haven't really known where to start writing since school let out, and I am officially a summer retiree--that is until yesterday!

 Yesterday, I had a few minutes before my 4-H friend arrived for a little sewing lesson, so I sat down at the machine and started attaching the binding on a quilt that has been laying around my house for about 3 years. It was my mom's quilt top that I found in her sewing stuff after she passed away. I took it to my long arm quilter and had it quilted in the "Jitter Bug" pattern about a year after Mom died. She loved to dance the Jitter Bug, so that seemed fitting. Since then it has laid in one place or another around my sewing room with the binding neatly wound in a "jelly roll" on top of it. I just never have been able to find the time to finish it.

 Yesterday when I actually found the time, I realized I had not really wanted to finish it for those 3 years. I started sewing, and that feeling I get when I think about my mom and all her work--needle and otherwise--washed over me. Her favorite question was always, "have you got your work done?" My favorite answer was always "I am working on it, MOM." As long as everybody was working on something, she was happy because she was always working. Even her sewing and flower arranging was considered her work. It hit me in those moments that if I finished her quilt, her work would be done! I found that hard to imagine, so I stopped before I got all the way around.

 Last night I told my husband about my work on my mom's quilt, and he responded with "don't finish it!" Even he understood.  I gave it some thought and decided to at least finish attaching the binding. I am not sure when I will get around to sewing it down by hand, but at least I can say, "I am working on it!"

 Glad to be back!
M

Wednesday, March 25, 2015

Winter Work Update

My, how time flies when you are frozen into a human shaped ice cube!  Now that I am thawing, I have realized that I have not written for several weeks.  Never fear, that does not mean that I haven't been sewing, knitting, and yes even biking.  I have.  

I have a new grandson on the way, so much of what I have been doing is finishing up projects for others and myself, as well as reorganizing my sewing room in preparation for some serious grandma sewing. I cannot wait to get my hands on some great children's prints and create some unique things for him.  I have attended a craft retreat with friends, started some small baby projects--finished a few. I have also been working on my EPP sew- along--slowly.  I have been looking at the Millefiori quilts on Instagram and am somewhat discouraged with my first attempts.  Some of those projects are simply devine!  My work withers by comparison.  However, I will charge on and finish this table topper--I will.

Here is quick look at my winter work and our retreat venue.

Hope you have had a productive winter, and are getting primed for the warmer weather!
M


Sunday, February 1, 2015

Sew Along Update


Happy February all!  I am amazed at how quickly January flew by!  Today, I Just wanted to check in and show you how my EPP project is coming along.  I feel like I am really starting to find my comfort zone.  First, I settled on whip stitching the pieces together.  It seems to be my best choice at this point.  I also love the addition of red and am starting to think about a very bright, fussy, and more modern next project.  I love the little baby quilt in the back of my book, The New Hexagon, so I am using that as my inspiration as I finish this project and continue to work on machine pieced creations and my knitting. It's the project in the back of my mind.


Additionally, I have learned something about myself while working on this project.  I guess this is something that I have always known, but I never really admitted it until now.  I am impatient with the process at times.  I do not think that I have ever cut an entire quilt before starting to sew.  I have never made all of my blocks before I start putting the rows together, and it is rare that I buy the entire quilt at one time.  I almost always leave the backing until I have the top finished, or I wait to get the binding after I have seen the top quilted. I guess I just can't wait to see things coming together, or maybe it is that I just love the sewing better than the preparing.  Who knows, but EPP is making me very aware of my own habits and processes.  I am putting things together before I get the larger hexies pieced, and I am designing on the fly.  Typical Mary!

Hope your EPP project is coming along quickly and is giving you much joy!
M

Monday, January 26, 2015

The Caroline and the Judy: EPP Shapes and Stitches Sew Along

Well, it seems that I am behind on my posting.  My humblest apologies.  My only excuse is some extensive dental work, a scan of the sinuses, and a few machine projects that needed some attention. Oh and let's not mention that day job!

Since our last encounter, a couple of good things have happened with my EPP project.  First I figured out a good container for portability that works for me.  I have seen all of these nice little tins with everything neatly packed and ready to go, but found that this is just too small for me.  I like to be able to take everything and find it easily.  So I found a neat food container in the plastics aisle at the closest superstore.  It works great; I love the divider, and the lid makes a great work space in the car.

The second great thing for me is that I decided to add red to my table runner.  I see two color creations all of the time and truly love them.  And, someday, I will make something great in only two colors.  However, this handwork was just begging me to add some color--so red it is!

Third, I decided to add another block from the book.  I started with the Caroline and have now added the Judy.  I love them both.   (Oddly enough, I had two friends in high school named Caroline and Judi.  Judi even has a daughter named Caroline.  Maybe that has something to do with it. We have been out of school longer than I care to reveal, but life's little coincidences make me smile.)

Finally, I have settled on a small table runner this time, but I am working on the next project in my head and really want to make the little quilt in the book, The New Hexagon.  I am thinking of a boyish look for my first grandchild, which is a boy expected to arrive this summer.

Happy piecing
M

P.S.  What is your best advice for the novice English Paper Piecer.  Leave your comment below.  Let's have a discussion.

P.S.S.  I recently finished this little quilt for a very sweet girl with whom I work.  Her adorable little boy has arrived and all is well.  We are all so very happy for Dawn and her hubby.


Tuesday, January 13, 2015

Success! First Block of my EPP Stitches and Shapes Sew Along

Here it is! This is my very first EPP hexie block.  I think I like it.

"Caroline" from The New Hexagon by Katja Marek.

A couple of things that have worked for me:
  1. Pressing is important for me.  Before I attach one piece to the other, I press the prepared pieces.  I just feel that this helps me get my corners crisper and makes aligning the pieces for sewing a little easier.
  2. Using glue.  I put a tiny little spot of glue on the paper template and hold it tightly to the fabric before I start folding it down and basting.  This helps me with positioning the fabric and prevents slipping as I baste.  I truly am "All About the Baste," but this little dot of sticky makes all the difference.
  3. Cutting Fabric.  I am finding that the more carefully I cut my fabrics, the nicer my backs look.  I know that may not matter to some, but I find it is like embroidery for me--the back should be almost as neat as the front, or I cannot consider myself "good" at it.
Issues that have come up for me:
  1. Portability.  Everything I read suggests that one of the perks of being an English paper "piecer" is that it is portable and can go anywhere.  I see the possibilities here, but for some reason I cannot get an organized system together.  My first attempts have just been too "fumbly."
  2. Whip Stitch or Ladder Stitch? I am trying to perfect my ladder stitch, but find that I often revert to the whip stitch or something new and unique that is something akin to both.  Not that this is a big issue if the front looks good, but the ideas of process and perfection seem to be important to me.  Can anyone say "vanity?"
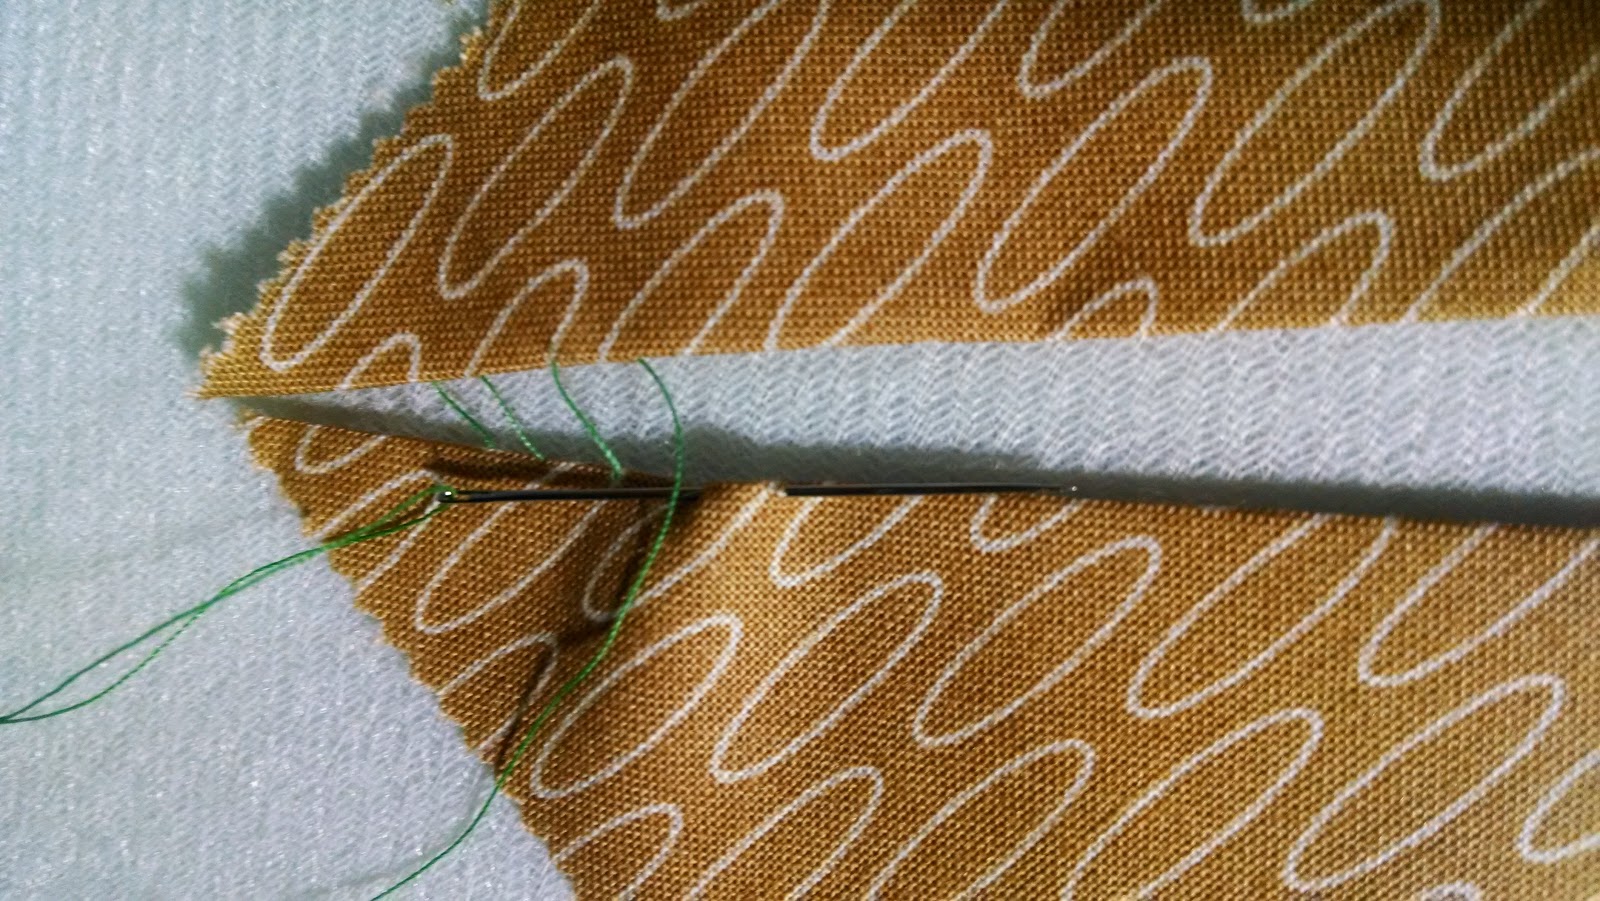
Ladder stitch

New Goals
  1. Complete block two and play with placement.
  2. Try to perfect the ladder stitch.
  3. Find a way to contain my accouterments for portability. 
All in all I am pretty proud of my first block. I am interested what you have going on in your EPP project.  Are you setting goals?  Are you experiencing difficulties or successes you can share? Leave me your comments and suggestions.  Come sew along with Meredith and me!

M


Wednesday, January 7, 2015

EPP Shapes and Stitches Sew Along #1

English Paper Piecing is the process of preparing small shapes by wrapping fabric around the edges of a template in order to sew them together into something wonderful.  Well,that is my definition anyway.

So, I agreed to be part of this sew along with Meredith and promptly decided that hexies are my shape--at least for starters! I think it has something to do with my love of the snowball block and this cold bathroom floor that for the past 25 years I have looked at most mornings with disdain  Whatever it has been, that is where I am going to start--the roundly rugged hexagon!
  On my trek over the river and through the woods back to my house, I realized that I really needed to conduct some research on this English Paper Piecing. I knew my shape, but this is some serious stitching.  So I made a quick trip around the web and found some interesting information, tips, and books.  I bought one for my
Kindle, The New Hexagon by Katja Marek, and quickly began dabbling in the process of preparing my first few hexies.


Here's my plan:
1. Make a table topper from Hexies.
2. Use my Fiskars Hexie Punch to make two inch templates from card stock and/or magazine ad cards.
3. Use black, white, and gray, which is always subject for re-eval.
4.  Use different blocks from my new book until I get the hang of it and can design my own.
5. Complete at least one block a week.

First lesson for me!  "It's all about the baste." (Thanks for the great line, Meredith)

I began my journey down the EPP lane with the process. I started with three different methods of preparing the little shape.  Some people baste only the corner folds, some use glue all the way around, and some just baste.  So I tried all three.  My favorite process is this one.  Cut your paper template, poke a hole in it for easier removal, add a dab of glue to the back, press firmly to the wrong side of the fabric, and begin folding the edges around clockwise.  Then baste that little sucker all the way around. It just works better for me.  I feel more secure, and I like the way my finished little shape looks once I press it!

That is where I am at this point.  I am off to make some snowball blocks for a baby quilt and then work on my hexies.  I will be back really soon with one finished block--I hope.

Until then remember, it's all about the baste, no trouble!
M

Tuesday, January 6, 2015

EPP Shape and Stitch Sew Along


A couple of weeks ago my friend, Meredith, over at Material Girl Quilt Shop, and I were discussing our developing interests in English Paper Piecing. She knows I love handwork and is always sharing her latest tools and gadgets for lap work with me when I visit.  As a result of our visit, we decided to do a sew along together.  We will both be teaching ourselves, helping each other, and sharing our thoughts, ideas, tips, and designs with you over the next few weeks.  

We would love it if you would join us and share your questions, knowledge, tips, creations. . . . We will be completing a block a week and sharing it here and over at Material Girl's Blog.  I have gathered some supplies, picked a shape, and am ready to get stitching.  How about you?  

Hope to see your EPP creations soon!
M


PS.  I just wanted to share with you two of my favorite Christmas in July creations.  I made these quilts for my sons. Very macho guys but reduced to teary eyes when they opened these "blankies." 


Friday, December 12, 2014

Easy Baby Boot Knitting Pattern

I am sorry it took me a bit, but life has been a little hectic!  As promised here is my little pattern for the Baby Boot. Remember that I am a novice knitter, and I have taken what I have learned from others' patterns and blogs to create this. So, feel free to leave helpful tips and comments.

 I hope you get a chance to make them some sweet baby feet soon.

 My Baby Boot

Fits babies 3 to 6 months.


I used a medium worsted yarn and size 4 needles.

Cast on 45 stitches.

 Rows 1-12 Knit in stockinette stitch for 12 rows. ST st is created when you  knit one row purl the next.

Row 13-Knit 19 stitches, K2tog, K 3 stitches, K2tog, K19

Row 14-Purl 18 stitches, P2tog P3stitches, P2tog, P18

Row 15-Knit 17 stitches, K2tog, K 3 stitches, K2tog, K17

Row 16-Purl 16 stitches, P2tog P3stitches, P2tog, P16

Row 17-Knit 15 stitches, K2tog, K 3 stitches, K2tog, K15

Row 18-Purl 14 stitches, P2tog P3stitches, P2tog, P14

Row 19-Knit 13 stitches, K2tog, K 3 stitches, K2tog, K13

31 stitches on the needle.

Row 20-knit all stitiches
Row 21-Purl
Row 22-knit
Row 23-knit
Row 24-Purl
Row 25-Purl
Row 26-Knit
Row 27-Purl
Row 28-Purl
Row 29-Knit
Row 30-Knit
Row 31-Purl
Row 32-Knit
Row 33-Knit
Row 34-Purl
Row 35-Purl
Row 36-Knit
Row 37-Purl
Bind off knitwise

Connect fuzzy coordinating yarn and single crochet every stitch along the top.  

With right sides together, stitch the soul and back seams together.


Friday, December 5, 2014

Make a Baby Boot--Bootie

Oh my goodness, there is something about little baby feet that are so simply sweet.  I have been on a little bit of  booties extravaganza lately.  Last night, I took my knowledge of the basic flat knit booties and tweaked it to make this little boot!  I love it! I am working on the actual directions as I knit up the mate.  Can't wait to share!
Happily knitting!

M

Sunday, November 30, 2014

Easy Mug Rug Tutorial

As you may have gathered, over the last few years I have developed a great love of precuts. However I have also accumulated a great number of stray charm pack pieces from the projects that I have made with them. I have a tendency to leave a fabric out or pick up new packs to strengthen my stash. This causes a great stack of charms.

 The other day when I was giving my sewing room a quick once over, I decided that I needed some projects that would use up my charming little super stack of stash.  You know-so I can buy more!
I think I have a few hexie ideas waiting in the wings, but today I want to share a quick project that can be used for mass gifting—teachers, colleagues, neighbors, mail carrier, grab bags. . . . . .

I do not know where this pattern originated, but a dear friend showed me how to make these mug rugs years ago. I repeat this is not my pattern, but over time I tweaked it and made it one of my favorite go to gifts.  When Emily showed me how she made these, we used pieces that were 4.5 inches. I like them a little larger when finished so I upped them to 5 inches. Imagine my thrill when charm packs hit the fabric shops!

Easy Charm Pack Mug Rugs 

You will need:

Saturday, November 1, 2014

This is War!

I very recently realized that I have been neglecting my writing here.  If you have been looking for something new, please forgive me.  I have been very busy getting "behinder and behinder." It is no surprise that I love fabric.  Every time I get a new supply, I tend to want to start a project immediately.  If I learn or see something I haven't done before, I want to try it and practice.  I think you might be getting the picture here.  I have lots of things started!

I have reached the point of mental shut down. It has become such a pile of unfinished this and thats in my sewing room that when I enter I do not know where to start.  When I go to my chair and look at the handwork projects there, I do the eeny, meeny, miny, Mo, and often find myself swapping out projects because Mo picked the wrong thing!  At this time, I am sewing and knitting some of my Christmas gifts, making pillowcases for a great local cause, working on my first t-shirt quilt for a friend, designing a couple future gifts, and of course keeping up with my day job, so I can afford to  keep up my fabric snobbery.  Consequently, my head spins every time I enter my sewing room, and I have to make some choices about what to do first.

I think it is time I declare war!  I think the best wartime strategy at this time is a priority list.  So here goes!

  1. Finish pillowcases.
  2. Attach binding to a quilt.
  3. Pin and quilt t-shirt quilt.
  4. Finish current knitting projects.
  5. Clean and reorganize the sewing room, so I can find the things I have started that will be left to do after this list is accomplished.
  6. Make a new list.
  7. Start again.
I have much more to do, but I feel like I might be more apt to get any of these things conquered with short term goals.  So just as soon as I sign off here,  I will tidy up the perimeter and the priority list in focus.  Once I have these things done, I will develop an new plan of attack....well that is if I am successful with this one and manage to reclaim my sewing space!

Before I go, I want to show you some of what I have been up to.  I can't show too much since most are gifts, but who wants to look at a sewing blog with no pictures?


The war is on!
M

 Bear Creek Designs, Pumpkin Mania!
Easy pattern for great impact.  I made several but gave them away.  Maybe I can find time to make a few for myself!

The knitted piece is a beautiful lavender alpaca blend from Bernat.  I did the stockinette stitch for five rows then a purl 2 together yarn over row to get the pattern.  I was just playing around looking for an idea, and this seemed to work out lovely.  I got lucky!

The wreath was a quick throw together between things simply because I needed to feel like I was getting in the swing of fall.  Don't you just love what can be done with burlap.  I am sure my grandma would not be too impressed since her understanding and use of burlap was much different, but I like it.

Shhh! Not saying anything more than I have found a fantastic long arm quilter, and I am grateful.

And finally, the t-shirt quilt.  It is ready for pinning.  I only hope I can muscle it around easily enough to get it quilted before the "enemy" retaliates with more ideas!


Sunday, September 21, 2014

Word to my Mother!

At one point in my life I had visions of teaching my daughter how to sew, embroider, cook and such. However, I was blessed with two rough and tumble sons who have taught ME the love of football, the ability to identify several car types by the grille, tolerance for all things boy, and a huge amount about life. (My younger son still thinks it is fun to perform daredevil feats of strength and agility, while my older son is crazy in love with driving FAST and fighting squirrels and such. I have spent many moments with my hands over my eyes and butterflies in my stomach.) I taught them what they could feign interest for along the way, like how to do some cleaning, some cooking, and make crafty things for 4-H; however, while my true talents benefitted them greatly, I think most of their interest was just to make Momma happy.

Last night  after a trip to the local Ben Franklin store, I started teaching my younger son's girlfriend how to knit.  She is like a little dream come true for me because she loves crafty things and wants to learn everything I do. I am a self-taught knitter, so I have learned how to do things from friends, video, and books.  I am truly a novice.  Having said all of that, as I was teaching her how to do the knit stitch, she made the comment that I make it look so easy and and that my fingers seemed to move so easily.  It occurred to me then that I have had some type of handwork in my hands since I was very young. I always wanted to do whatever my mother did.  I recall sitting at her feet with "sewing" cards while my older siblings were at school.  
It was really lacing, but I learned how to hold a needle and a great deal of hand/eye coordination was developed.

This moment brought me back to my first post.  Again, I must say that I am very grateful to have my my mother's hands.  

As for the knitting, well Ashley is going to get it figured out, I think.  I bought her some knitting needles and a pretty skein of yarn and gave her a book and some leftover balls of yarn to take home and use for practicing.  We found her some videos to watch, and if she keeps after it, she will be knitting her own gifts and scarves before long.  

As for me, I have been working on some scarves with which I am truly in love and think that my next projects are going to be a shawl for me and some sweet baby ponchos.


Once again, thanks Mom!
Love M


Wednesday, September 17, 2014

Tricks or Tips from Talented Quilters

About once a month I try to make my way to Material Girl Quilt Shop for Quilt Club.  I am a new member to the club, but I have been a customer for several years.  I am not sure why I never went to the meetings before, but I am certainly glad that I have started.

We meet monthly, bring show and tell, visit, trade sewing tips and information, and often have some small program.  I love every minute, and the quilts that I get to see are beyond fabulous.  This is a truly talented group of quilters.  Their creations are beautiful, precise, colorful, and seriously praiseworthy.  I am honored to be part of the group.

At our last meeting the program was for everyone in attendance to submit a sewing or quilting tip that she finds very helpful.  I offered to publish our time-tested, tried and true tricks and tips here.  So here they are.  Trust me, you should be able to find at least one new idea or twist to an old one in this list.

Mary Ellen--I have learned to chain stitch blocks so as to not have to cut threads and start over.

Janice--When selecting fabric for a project, look at it from a distance.

Cele-- I put scissors, thread, needle, thimble, and needle threader in a tin to bind quilts on the go.

Brenda--Whenever I finish a quilt, I clean my quilting room from top to bottom so each quilt begins with a fresh start.

Lori--When putting in zippers attach one side.  Mark the important matching points and pin at the mark.  Sew 1" on each side of the mark then check to see if all matches up before sewing the rest.

Tracy--Use gluestick to attach hexi material to paper pattern then it peels away easily.

Kim--When you think you need to buy any new "doodad" or new fabric, always check if you have one already or some fabric close to the same first.

Toni--Put a scrap  under the presser foot before stitching to help prevent material from going into the needle hole.

Linda--When you start a project, have several bobbins already wound, so you don't have to stop and keep rewinding bobbins.

Me--When making bags or anything that has small pieces to add in the seam, such as a loop, use tape instead of a pin to secure it.  This prevents it from slipping and avoids issues with sewing over pins.

Jan--Spray wrinkled or creased fabric with vinegar and water.  The vinegar acts as a fabric softener.

Alicia--Put all the fabric and patterns for projects in ziplock bags, so that when you are ready to work you have it all together.

Jane--Always follow directions at least once.  Make a prototype block first.

Lynn--When trying to get the right contrast in fabrics, take a black and white picture of it.

Janice--Chain piece to make the sewing go faster.

Debbie--Chain sew to the point that your next pass will have the next pairings to be sewn already together.  ( Debbie says she tries to prevent any need to cut threads and stop sewing until she just has to.)

Barbara--Buy lots of fabric!

Sara--When laying out a quilt top and putting the blocks together, take a picture before you sew.  This allows you to spot errors before you make them.

Meredith V.--Wind multiple bobbins because everybody gets mad when they have to stop and wind another while making a quilt!

Karen--When sewing a dart you do not want to dimple at the apex, sew the last several stitches really short (0.2 or 0.4) and put a tiny dime sized piece of fabric at the apex.  Run your stitches on to the little piece of fabric just a little bit.

Meredith S--When cutting fabric for a quilt, fold the pieces of fabric that are left over wrong side out, so you know that you have already cut it.

So there you have it.  Tricks or tips to get you through the fall.  I hope you find a little something you can use.

M